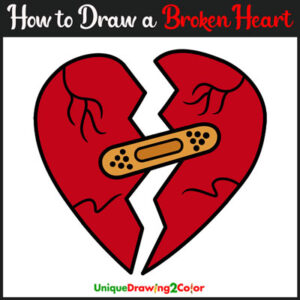
Let’s learn how to draw a broken heart! We have all been here! Broken heart syndrome! At least teenagers know this very well, and what else is there other than writing to express your heart is crushed and broken into pieces? But it’s not that easy, especially not when you are sad! So, learn the drawing and find peace, and who knows you might feel better while drawing this.
A broken heart is an expression that we use when we are sad and deeply moved by anything unfortunate. Most of the time, it’s the break-up that causes this phrase. It can be drawn in many ways, as there are no particular patterns. Here in the below is the given step-by-step drawing guides that once you learn will be extremely easy. Let’s show you how the magic happens.
Know-it-all Before You Start…
Drawing Materials Needed:
- Drawing sheet
- Color pencils
Expected Time:
- 30 minutes (Including coloring)
Difficulty Level:
- Moderate
How to Draw a Broken Heart Step by Step
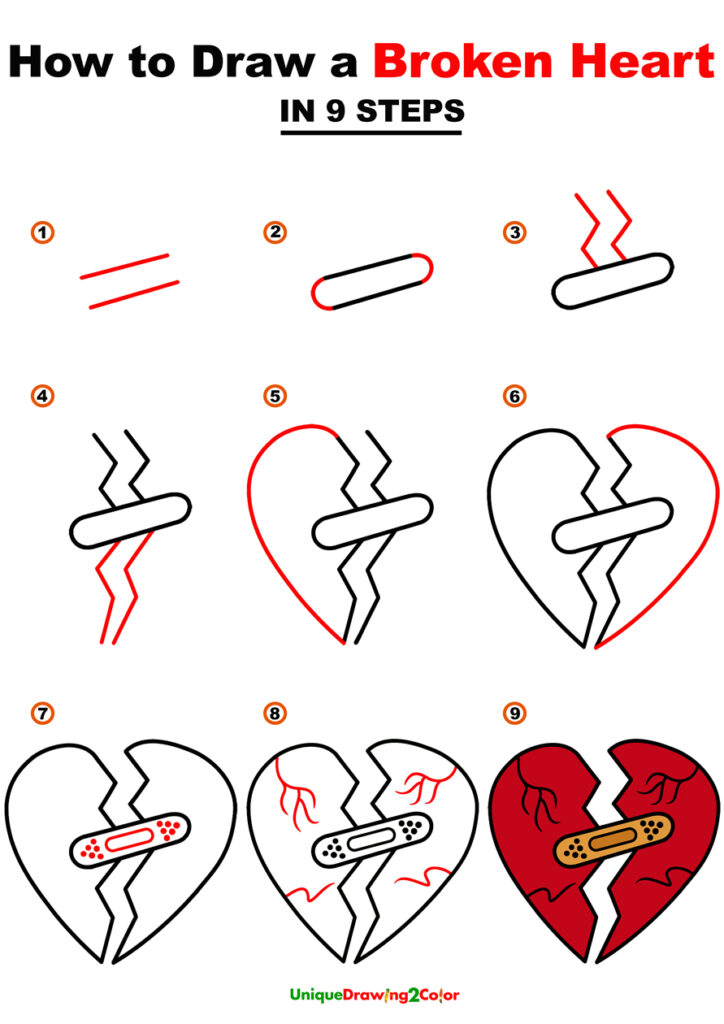
Step 1: Draw two small lines across the drawing sheet.
Step 2: join the two sides by drawing a small C on the left side and an opposite C on the right side. Now you have a horizontal capsule.
Step 3: Draw and attach two elongated Z’s like the following on the upper side of the capsule.
Step 4: Draw two elongated Z in a left-side-right manner and make the two ends come closer like the following.
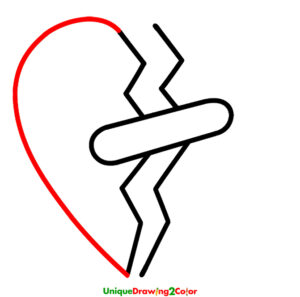
Step 5: Now join the left two Z by a typical curve that would give you the pattern of half heart.
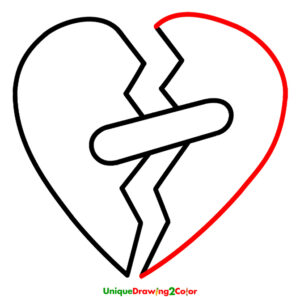
Step 6: Join the right side similarly.
Step 7: Draw two-three small spots and a smaller capsule within the capsule to make it look like a band-aid.
Step 8: Draw the veins and arteries in no particular order.
Step 9: Color the heart!
Broken Heart Drawing in One Picture
A broken heart is not that easy to mend, but it’s easier to draw! Without any guidelines, it can be difficult, especially without any reference. So, if you are attempting for the first time, you can also try this one picture tutorial as well. Click on the PDF and save it for later!
Video: How to Draw a Broken Heart
This is even cooler! The video would be more conducive to learning because you can see an online tutorial on how the drawing would be made. The concept might become clearer for your creative self.
This tutorial gives enough scope for creativity with the band-aid, nerves, artery, and veins parts. Even the color can be of your choice. This has straight lines (both horizontal and vertical), curves, and others. Hope you are satisfied with this, please browse through our other tutorials for more learning opportunities.

