Dear friends!! Today we will learn how to draw a cupcake in just 25 minutes. Here are the 9 simple and easy steps to draw a beautiful cupcake and then add colors to make it look more realistic and funny. A beautiful cute cupcake can really add some fun to your daily life. So here are the cool steps to draw a cupcake. Enjoy !!!
A soft fluffy cupcake is meant for one person. It is baked and served with a thin paper wrapper or aluminum cups. A spongy yummy cupcake can be of various textures and flavors like vanilla buttercream, Fudgy Vegan Beet Cupcakes, Chocolate Covered Strawberry Cupcakes, Orange Creme Cupcakes, Peanut Butter Fudge Coffee Ice Cream Cupcakes, and a lot more.
Know-it-all Before You Start…
Drawing Materials:
- Drawing Sheet
- Pencil, Eraser
- Small ruler (if required)
- Water Color/ Crayons
Expected Time:
- 25 minutes (Including Coloring)
Difficulty Level:
- Moderate
Cupcake Drawing Instructions
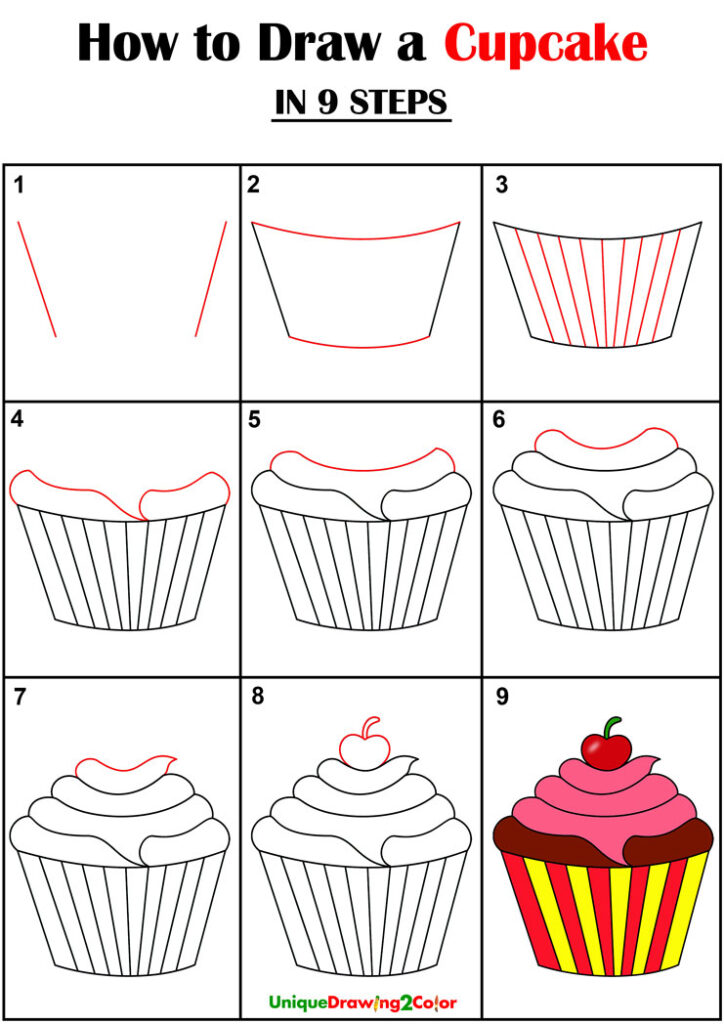
Step1: First draw 2 straight lines on the right and the left sides, a little closer at the bottom.

Step 2: Then draw 2 curved lines to join the top and the bottom ends of the two straight slanting lines.

Step 3: Now draw some more straight lines between the two curved lines which form the wrapper of the cupcake.

Step 4: Draw a bumpy line on the top of the wrapper just like the frost of the cake.

Step 5: Now add another smaller bumpy frosted layer right above the last frost layer.

Step 6: Add another one a little smaller in size than the previous one. Draw it smooth to make it look a little curvy at the top.

Step 7: Add another one smaller and curvy again.

Step 8: After drawing 3-4 layers of bumpy frost layers, draw a small apple right at the top to form a topping.
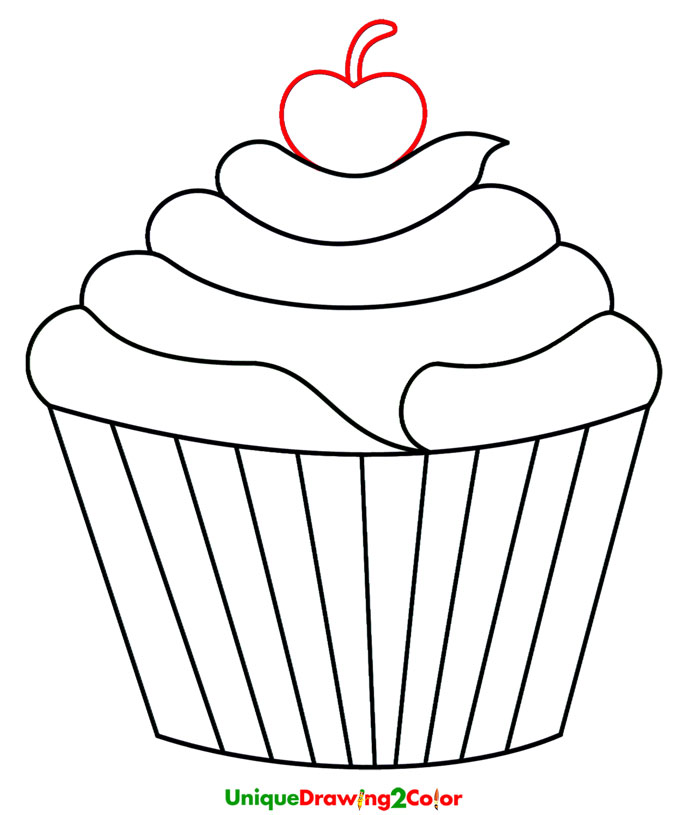
Step 9: Now add colors as your wish and make the apple red to make it look more natural.

How to Draw a Cupcake Step by Step
These step-by-step printable image instructions are an easier option for you if you don’t want to scroll through and draw at the same time.
Video
This detailed yet easy drawing with straight, curved, and bumpy lines will make you have fun while drawing a cupcake. If you like our page and want to draw more cool stuff through our art site, then keep visiting our page for other tutorials.