Drawing a moon is easy and fun! In this simple step-by-step tutorial, you’ll learn how to draw a beautiful crescent moon with clouds and stars. This guide is perfect for beginners and kids.
Before You Draw a Moon
✏️ Drawing Materials Needed
- Drawing Sheet
- Pencil
- Crayons/Water Color
⏱️ Expected Time
- 20–25 minutes (including coloring)
⭐ Difficulty Level
- Easy
Step-by-Step Drawing Tutorial
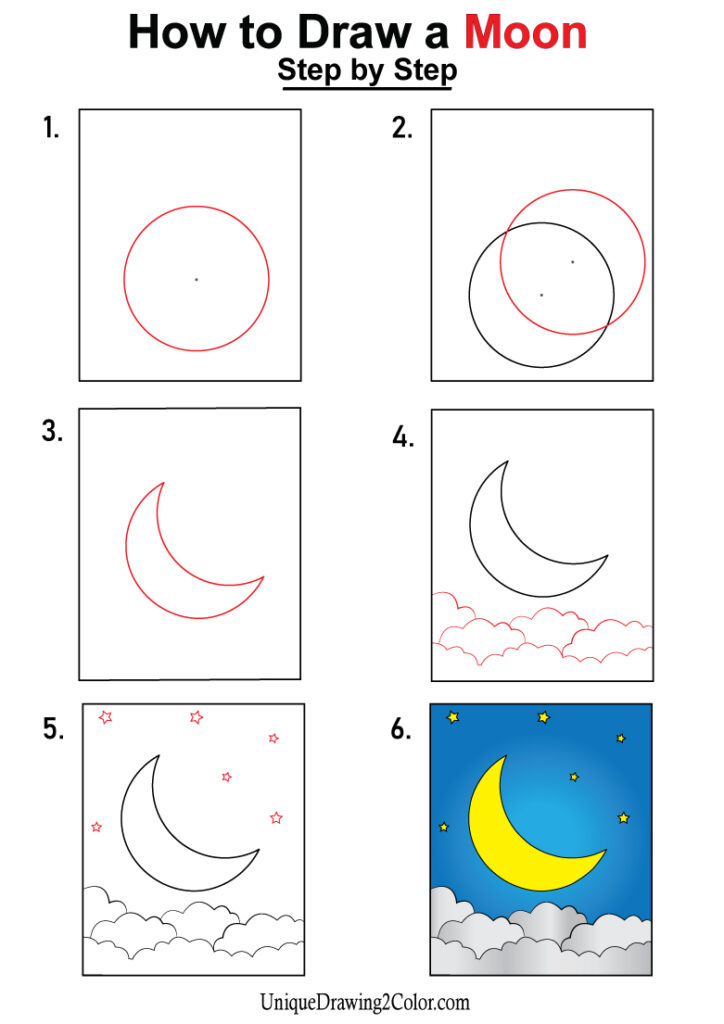
Step 1: Draw a Circle
Start by drawing a large circle in the center of your paper. Don’t worry if it’s not perfect — you can trace around a round object to help.

Step 2: Add a Second Overlapping Circle
Draw another circle slightly overlapping the first one. This will help create the crescent moon shape.

Step 3: Create the Crescent Shape
Erase the extra lines from the first circle, leaving only the curved crescent shape. Now your moon is starting to look real!

Step 4: Draw the Clouds
At the bottom of the moon, draw soft, fluffy cloud shapes. Use curved, bumpy lines to make them look light and airy.

Step 5: Add Stars
Draw small stars around the moon in the sky. You can make simple star shapes or tiny dots for distant stars.

Step 6: Color Your Drawing
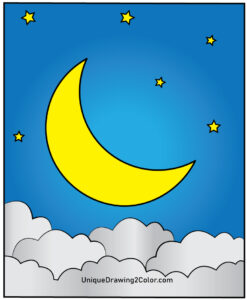
Color the moon yellow. Shade the sky blue and leave the clouds white or light gray. Color the stars yellow to make them shine brightly.
Free Printable Moon Drawing Guide
Download and print the step-by-step guide so you can follow along anytime!
Now you know how to draw a beautiful moon step by step. Practice more and try drawing different moon phases to improve your skills!